Unifosys

Custom Controls in Winforms and ASP.NET Webforms Chart4.NET

 How-to-use example using Chart4.NET Organization Chart Control

 Chart4.NET - Documentation  | Online-Demo  | Screens
Questions or suggestions? Quick Contact

The Chart4.NET component is a .NET assembly that you can use in Desktop (winform) and ASP.NET projects.

Case 1: You want to start from a sample project

  • Download an appropriate sample here (no installation required): Sample Downloads

  • Case 2: You want to start from a new project

  • You can find the assembly in a named folder within : Sample Downloads
  • Then create a Windows Application / ASP.NET Application project in Microsoft Visual Studio.
  • To use the control, first you have to add the control to Toolbox.
    -- For that, select Toolbox from View menu (in Visual Studio), if toolbox is not displayed.
    -- Then right-click a blank area of the Toolbox and select Choose Items... from the context menu.
    -- From the .NET Framework Components tab, click Browse button and select the downloaded assembly to include the control in toolbox.
    -- The control's icon will then appear in the Toolbox, in the selected tab: org chart in toolbox

  • >>> To use in a winform project:

  • Drag and drop the control icon to the form to use it.
  • You can put some code to load the chart with data as in the Load Data button in the Winform Designer sample project.
  • Add some chart events to extend the functionality (Click on the control, select Events tab in Properties): org chart events
    Double-click on the RHS area to link the event to a handler function within the code.

  • >>> To use in an ASP.NET webform project:

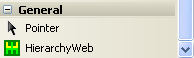
  • Once you see the icon in the toolbar, drag it onto the page you want it to be displayed. Doing this will add the following to the top of your page:
    <%@ Register Assembly="UnifoChart.Hierarchy.Web.Free" Namespace="UnifoChart.Hierarchy" TagPrefix="cc1" %>
    And you will also see the following where we want the custom control to be placed:
    <cc1:HierarchyWeb ID="HierarchyWeb1" runat="server" Style="z-index: 102; left: 0px; position: absolute; top: 0px" />
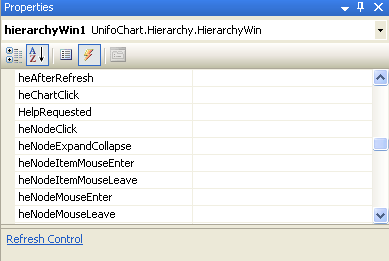
    Click on the control, select Events tab in Properties: org chart events
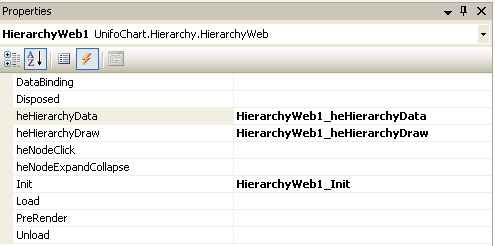
    The event heHierarchyData (to load data) is mandatory, and other events are optional.
    Double-click on the RHS area to link the event to a handler function within the code. After this is done, the finished control tag in the page source will look like:
    <cc1:HierarchyWeb ID="HierarchyWeb1" runat="server" Height="400px" OnheHierarchyDraw="HierarchyWeb1_heHierarchyDraw" Style="z-index: 101; position: relative;" Text="MK" Width="700px" OnInit="HierarchyWeb1_Init" OnheHierarchyData="HierarchyWeb1_heHierarchyData"/>
    The following is all that is needed for us to use the control within our page:
    using UnifoChart.Hierarchy;
    The above code will allow us to reference the control in our code, and also allow us to access its properties and methods.
    Once we have done this, we can access the control as below:
     protected void HierarchyWeb1_Init( object sender, EventArgs e ) { HierarchyWeb1.hpcSettings.Chart_Style = ChartStyleType.ThreeD; HierarchyWeb1.hpcSettings.Chart_Layout = ChartLayoutType.FlexiExtended; } 
    Put the code in Page_Load as given below to complete the work:
     protected void Page_Load( object sender, EventArgs e ) { if (HierarchyWeb1.hmIsOnRender( ))//chart request { goto L_EXIT; } if (IsPostBack) { //TODO-1 goto L_EXIT; } //TODO-2 L_EXIT: return; } 
  • You can put some code to load data and to format chart as in the ASP.NET sample project.


  • The finished source code looks like below (The full code is omitted for clarity):
     using System; using System.Data; using System.Configuration; using System.Collections; using System.Web; using System.Web.Security; using System.Web.UI; using System.Web.UI.WebControls; using System.Web.UI.WebControls.WebParts; using System.Web.UI.HtmlControls; using UnifoChart.Hierarchy; namespace USys { public partial class demo : System.Web.UI.Page { protected void Page_Load( object sender, EventArgs e ) { if (HierarchyWeb1.hmIsOnRender( ))//chart request { goto L_EXIT; } if (IsPostBack) { //TODO-1 goto L_EXIT; } //TODO-2 L_EXIT: return; } protected void HierarchyWeb1_Init( object sender, EventArgs e ) { // } protected void HierarchyWeb1_heHierarchyData( object sender, EventArgs e ) { // } protected void HierarchyWeb1_heHierarchyDraw( object sender, EventArgs e ) { // } }//class }//namespace 

  • >>> Notes:

    NOTE 1: The first time you drag and drop the control, the license is inserted into the project (in Properties folder). For this to happen, you have to run Visual Studio 'As Administrator'. If you haven't set to run Visual Studio 'As Administrator' by default, please right-click Visual Studio link (in Start menu or in your Desktop) and select 'Run As Administrator'. This has to be done (on first-time inserting the control), irrespective of whether you have logged in as an administrator/privileged user or not. Now open your project/solution from File menu; drag and drop the control.

    NOTE 2: If you get an error (usually in Visual Studio 2010) like this when opening a sample downloaded from the Internet (attributed to trust levels):
    Could not load file or assembly or one of its dependencies. Operation is not supported. (Exception from HRESULT: 0x80131515)
    Then, right-click the zip file and unblock as mentioned in the msdn blog ...Operation is not supported....


    © 2008-, Unifosys